
The next generation of Windows Subsystem For Linux (WSL) is included as part of Windows 10’s latest feature update 2004.
What’s all the fuss about
Having worked using the first version of WSL in several projects within the past 1,5 years I had been already waiting to transition to its next generation. The only thing holding me back for so long (WSL 2 has been in preview for quite some time) had been the fact it required extra effort to get it installed, joining the Windows Insider Program and what not. I wanted to wait until it’s stable enough for Microsoft to distribute it as part of a regular Windows Update.
The day finally arrived.
If you’ve ever tried using WSL in some real projects, you’ve probably noticed it can be painfully slow. Building a bigger Docker image or installing npm packages can take ages. For this kind of reasons, I’ve actually started to avoid working from WSL when I can. But with WSL 2 I don’t have to anymore.
The next generation of WSL seems to deliver on its promise.
Upgrading to WSL 2 on Windows 10
The latest Feature update for Windows 10 (version 2004) was published last week.
To get started, open Windows Update and proceed to install it. It takes around 5-10 minutes after the reboot for the installation to finish.
WSL 2 is not automatically enabled, there are some extra steps involved in taking it into use. I noticed this when I tried to set my default WSL version to 2 after the Feature update:
1 | C:\>wsl --set-default-version 2 |
Go ahead and proceed with the manual update of the Linux kernel (x64).
If you have Docker for Windows Desktop installed, it will inform you about the WSL 2 Backend initialization

Last but not least, make sure the Linux distro installed and used through WSL is using version 2. For instance, I had Ubuntu still running on WSL 1 at this point. It’s possible to convert the existing Linux distro to use WSL 2 but I decided to uninstall it completely and replace it with a fresh installation of Ubuntu from the Windows Store. Since WSL 2 was set as the default version it picked that instead now. You can find more details on this topic from here.
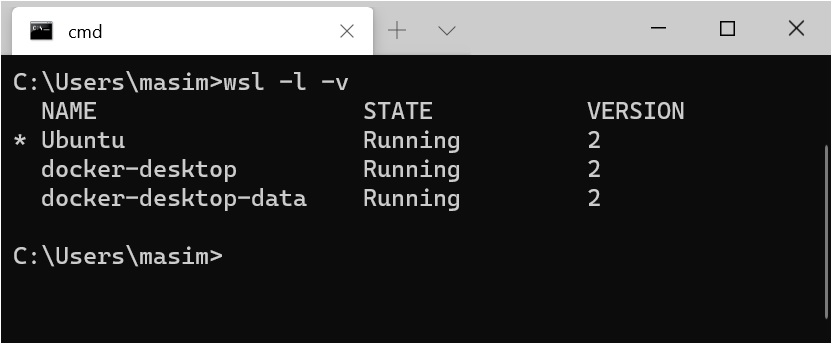
You should now have your Linux distro running via WSL 2:
1 | C:\>wsl -l -v |
Keep those file systems separated
One of the things I loved about when working from WSL 1 was the sharing of file systems. One concrete example is to utilize the same SSH keys you’ve set up on the Windows side - you could just point to those from WSL using symlinks.
With WSL 2 the Linux distro sees itself as it’s own operating system. Ultimately you need separate SSH keys for Linux in WSL 2.
This leads also to a bigger question: Should I just separate the file systems altogether? I think you should.
My approach was to create a folder called /repos under the root of my /home folder in Linux. Then I’m planning to create separate subfolders under there for different client projects.
For my personal projects (like this blog) the folder structure looks like this:
1 | /home$ find ./repos/ -mindepth 1 -maxdepth 2 -type d |
An important thing to note here is granting your own user account permissions to these subfolders located under the root home directory:
1 | /home$ sudo mkdir repos |
Git, SSH keys and file permissions
It’s so easy to sudo your way around with Linux. When I was setting up Git and SSH keys for my new WSL 2 installation I learned why I shouldn’t be doing that.
First thing I did was to copy my current SSH keys from Windows to Linux:
1 | $ cd $HOME |
After this set the proper Linux file permissions:
1 | ~$ chmod 600 ~/.ssh/id_rsa |
Using config file helps in managing SSH keys for different Git hosts, eg for Github
1 | Host github.com |
Make sure to also include this in your ~/.gitconfig
1 | [core] |
Notice how I’m not using sudo here? There is a reason for that.
I was struggling with getting ssh agent working in WSL 2. The issues were caused by the fact that the file permissions were tied to sudo user, not my own user account.
Now you should be able to complete also these steps (Ubuntu)
1) Install keychain
1 | sudo apt install keychain |
2) Add the following line at the end of your ~/.bashrc
1 | eval ``keychain --eval --agents ssh id_rsa |
3) Restart your terminal session and behold
